Builds

HOLLOW PvE Starter Builds and Skill Buying Priorities

Last updated:

Build around the attacks you want to use before spending your stat points and Yen. These HOLLOW Roblox PvE starter builds give you a focused first purchase, useful upgrades, and a practical way to fight between skill cooldowns.

Editorial early-PvE skill purchase priorities based on entry requirements, combat role and usefulness alongside basic attacks

First Picks

Low-threshold options to consider first for your chosen stat branch.

Diving Impale

Requires 5 Strength and costs 500 Yen. Its forward thrust and stagger add a useful opening to basic melee attacks.

Properties
Tier
1
Strength required
5 STR (Both shop requirement sets.)
Price
500 Yen (Skill Shop purchase price.)
Effect
Step forward with a thrust, staggering enemies in the path. The Portuguese description uses stun wording.
Scaling
Strength
Equipment examples
Hotbar slot 2 in several loadouts and slot 3 in a Portuguese-menu purchase example. (Hotbar arrangements, not fixed skill keys)
Scales with
Strength

Blink Cut

Requires 5 Speed and combines forward movement with an attack. It helps close gaps and is used alongside sword attacks in the Shikai Spirit fight.

Properties
Tier
1
Speed required
5 SPD (Both shop requirement sets.)
Role
Forward dash attack
Effect
Flash forward and slash enemies along the path.
Scaling
Speed
Equipment examples
Hotbar slot 3 in melee loadout examples and slot 4 in a playtest loadout.
Scales with
Speed

Build Expansions

Add these when their attack pattern fits your preferred PvE approach.

Mountain Splitter

Adds a heavy knockback slash for 1,500 Yen. It expands a melee kit after the initial thrust, provided its current Strength requirement is met.

Properties
Tier
2
Strength required
10 STR (Shop requirement set with Fault Ripper at STR 15.)
Strength required
20 STR (Shop requirement set with Fault Ripper at STR 55.)
Price
1500 Yen (Skill Shop purchase price.)
Effect
Raise the sword and deliver a heavy slash that knocks enemies backward.
Scaling
Strength
Equipment examples
Hotbar slots 3 or 4 in different loadouts, and slot 7 in a playtest loadout.
Scales with
Strength

Flower Frenzy

Provides repeated frontal slashes for a Speed-focused setup. Choose it when you can hold position and keep enemies in front.

Properties
Tier
2
Speed required
10 SPD (Shop requirement set with Mountain Splitter at STR 10.)
Speed required
20 SPD (Shop requirement set with Mountain Splitter at STR 20.)
Role
Rapid frontal slashes
Effect
Plant your feet in a sword stance and perform rapid successive slashes in front.
Scaling
Speed
Example hotbar slot
2 slot (Playtest loadout example.)
Scales with
Speed

Specialist Additions

Choose for a specific defensive or positioning need rather than as a universal first purchase.

Blade Press

Counters the first incoming attack from a sword stance. Its 7,500-Yen price makes it a targeted defensive addition rather than an early budget default.

Properties
Tier
4
Strength required
20 STR (Shop requirement set with Mountain Splitter at STR 10.)
Price
7500 Yen (Listed price in the shop with Mountain Splitter at STR 10.)
Effect
Enter a sword stance and counter the first incoming attack.
Scaling
Strength
Combat example
One Nozarashi playtest loadout used Blade Press in slot 6 to defeat a target in one use. (Target- and setup-specific playtest example.)
Scales with
Strength

Utsusemi

Combines an escape with a shell that responds to the first attack. Its higher Speed requirement suits a developed mobility build.

Properties
Tier
4
Speed required
40 SPD (Shop requirement set with Mountain Splitter at STR 10.)
Speed required
80 SPD (Shop requirement set with Mountain Splitter at STR 20.)
Role
Escape and counter
Effect
Flash Step away, leaving a shell that counters the first enemy attack. The Portuguese description describes the shell as blocking the first attack. (English and Portuguese shop wording)
Scaling
Speed
Equipment examples
Hotbar slot 5 in a PvP loadout and slot 3 in a playtest loadout.
Scales with
Speed

Besiege

Attacks forward and downward with wind blades from the air. Choose it to add a different attack angle to a Speed kit.

Properties
Tier
3
Speed required
15 SPD (Shop requirement set with Mountain Splitter at STR 10.)
Speed required
45 SPD (Shop requirement set with Mountain Splitter at STR 20.)
Role
Airborne wind-blade attack
Effect
Rush upward, hover, then slash downward to send wind blades toward enemies ahead and below.
Scaling
Speed
Equipment examples
Hotbar slot 7 in a PvP loadout and slot 5 in a playtest loadout.
Scales with
Speed
At a glance

For melee, start with M1 attacks and Diving Impale: it requires 5 Strength and costs 500 Yen. For mobility, start with Blink Cut at 5 Speed. Add Mountain Splitter or Flower Frenzy when you need more attacks, then consider counters for specific defensive needs. For Cero-focused progression, invest in Kido, recharge spiritual energy with X, and use Reiatsu Gloves for their maximum reiatsu and reiatsu power bonuses.

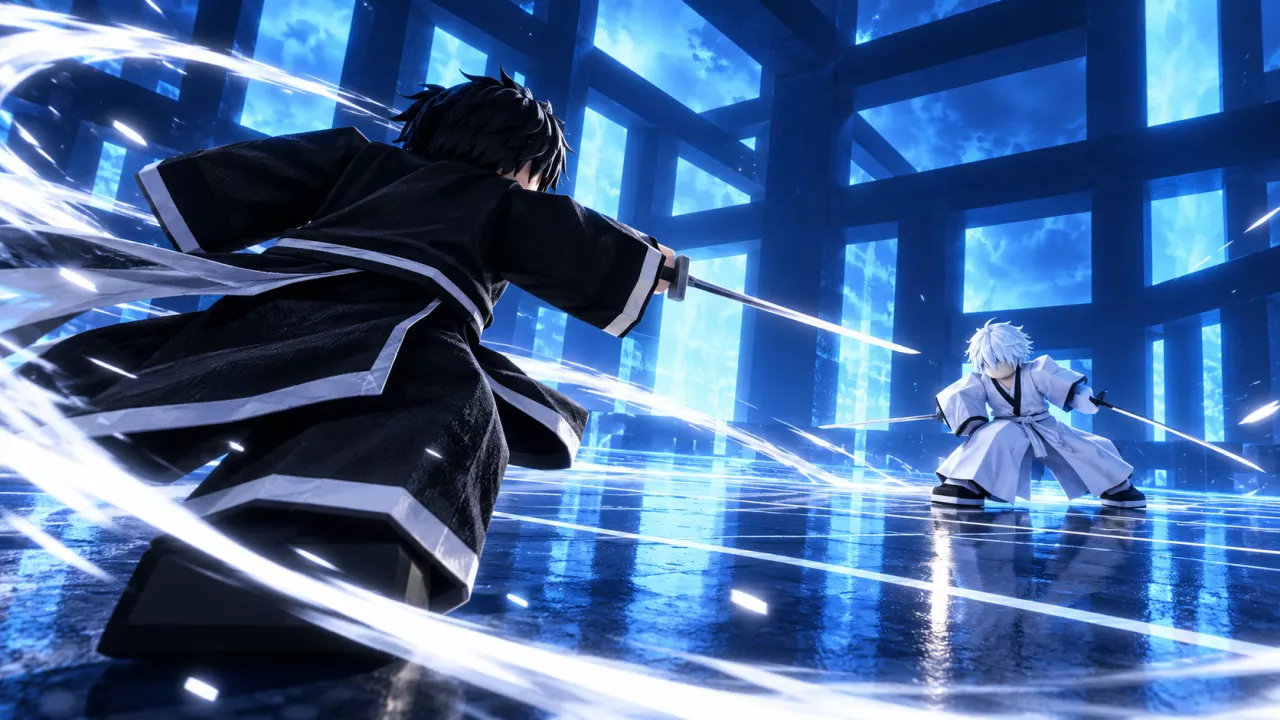
HOLLOW PvE Starter Builds and Skill Buying Priorities — illustrated cover

Choose Melee, Mobility or Cero

Direction Main investment Starter plan Choose it when…
Melee Strength: maximum health, physical defense and melee power M1 attacks plus Diving Impale You want to stay close and improve offense and durability together.
Mobility Speed: movement, attack speed, and Flash Step speed and distance Blink Cut plus sword attacks You want to close gaps and pursue moving enemies.
Cero Kido: reiatsu, spirit regeneration and spiritual power Cero with melee or defense between casts Your current form has Cero and you want to build around spiritual attacks.

Strength is a practical default for a straightforward melee start. Speed is more appealing when reaching the target is your main problem. Kido is the relevant investment for a Cero-focused approach; an all-Strength allocation favors your melee plan instead.

Choose one main direction, then add a second branch for a specific skill you will use. For example, meeting both Diving Impale's 5 Strength requirement and Blink Cut's 5 Speed requirement gives a mixed melee setup a thrust and a gap closer. Those are entry requirements, not a final stat distribution. Use the stat point planner to work out the additional points your chosen targets need.

Skill Buying Priorities for Early PvE

These purchase priorities favor accessible skills that add something useful to basic attacks. Follow the branch you intend to play; you do not need to buy every skill in a group before moving on.

  • First Picks — Diving Impale and Blink Cut: start with the one that matches your main stat. Diving Impale adds a forward thrust and stagger; Blink Cut combines forward movement with a slash. Both have a low entry requirement in their respective branches.
  • Build Expansions — Mountain Splitter and Flower Frenzy: add Mountain Splitter for a heavy knockback slash, or Flower Frenzy for repeated frontal attacks when you can hold your position. Choose the attack pattern you can land consistently.
  • Specialist Additions — Blade Press, Utsusemi and Besiege: choose Blade Press for a sword-stance counter, Utsusemi for an escape that leaves a shell to respond to the first attack, or Besiege for wind blades aimed ahead and below from the air. These solve specific combat needs after you have a usable core.

Before spending, check the requirement in your current shop and budget Yen separately. Some advanced skills have differing listed thresholds, so use the value shown on your skill card. The skills directory has the requirement variants, prices, and buying and equipment instructions.

Melee Starter Setup

Start with your equipped weapon, M1 attacks, and Diving Impale. Reach 5 Strength and set aside 500 Yen for the skill. Its forward thrust helps you reach an enemy and stagger it, giving your basic melee attacks a useful opening.

  1. Equip your weapon and close to melee range.
  2. Use Diving Impale when the enemy is lined up with the thrust.
  3. Continue with M1 attacks while the skill is on cooldown, returning to defense when the enemy attacks.
  4. Add Mountain Splitter once you meet its shop requirement and can afford the extra 1,500 Yen.

Diving Impale plus Mountain Splitter costs 2,000 Yen in total. If you already own Diving Impale, the remaining purchase is 1,500 Yen. Meeting the stat requirement and paying the purchase price are separate parts of this upgrade.

Mountain Splitter raises the sword before delivering a heavy slash that knocks enemies backward. Give yourself room for that startup: use an opening after an enemy attack rather than beginning the swing while a close enemy is already attacking. After the knockback, close the distance again before continuing with M1. If enemies repeatedly interrupt your heavier attacks, keep the simpler M1-and-thrust core and consider adding mobility before another heavy skill.

Mobility and Mixed Melee Setup

Build around Blink Cut if chasing enemies interrupts your damage. It requires 5 Speed and slashes along its forward path. Use it to reach a target, follow with ordinary sword attacks, and pursue again when the target pulls away.

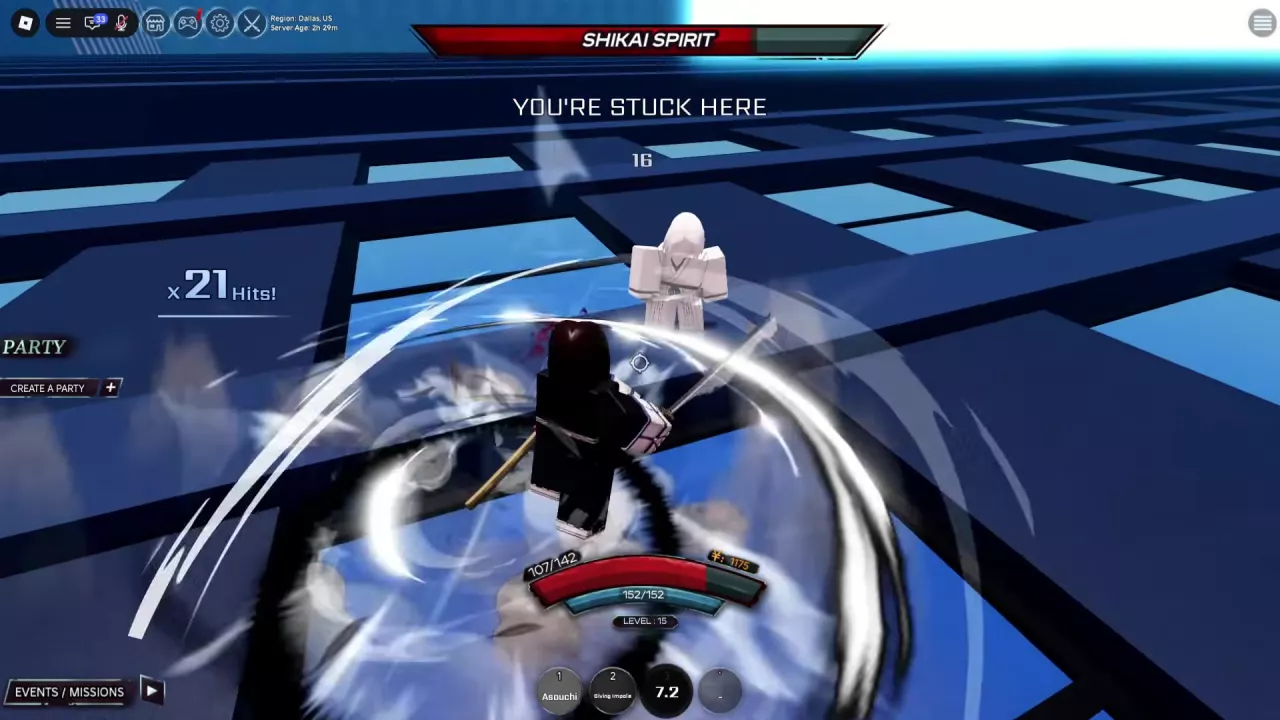
Add Diving Impale when you also want a forward thrust with stagger and can meet its Strength requirement. Sword attacks, Diving Impale, and Blink Cut work together in the Shikai Spirit fight: movement gets you back into range, while the thrust and basic attacks maintain pressure. Fit skill uses around their cooldowns and the enemy's actions. For the challenge's entry and unlock steps, follow the Shikai guide.

Choose later additions by the problem you need to solve:

  • Enemies remain in front of you: add Flower Frenzy for rapid successive slashes. Its planted stance suits a clear frontal opening better than an active chase.
  • You need to disengage: consider Utsusemi, which moves you away and leaves a shell to respond to the first enemy attack. Its higher Speed requirement makes it a later mobility investment.
  • You want to answer an incoming attack: consider Blade Press. Its stance counters the first hit, but its 7,500-Yen price makes it a deliberate defensive purchase after your basic kit is ready.
  • You want an aerial attack angle: add Besiege to send wind blades toward targets ahead and below. Choose it for that positioning option rather than as a substitute for Blink Cut's pursuit role.
Sword combat against Shikai Spirit in a blue grid arena, with Diving Impale and a cooling-down skill on the hotbar.

Cero-Focused Progression

Invest in Kido when Cero is central to your plan. Kido improves reiatsu, spirit regeneration, and spiritual power, making it the relevant direction for repeated spiritual attacks. Keep a usable melee attack available so your offense does not stop whenever Cero is cooling down.

  1. Confirm that Cero is available on your current form's skill bar and check its assigned key.
  2. Press X to recharge spiritual energy when you have a safe opening.
  3. Cast Cero when you have an opening to attack.
  4. Use M1 attacks if it is safe to stay close, or block and reposition while waiting for the next cast.

Reiatsu Gloves are a useful accessory target: equipping them adds 5% maximum reiatsu and 3% reiatsu power. Those bonuses support your spiritual resource and power stats. See the accessory guide for their source and equipment steps.

If your current form provides Hierro, use its damage reduction to support your defense. If it provides High-Speed Regeneration, keep that recovery option available. Build around the abilities on your own bar, since form-dependent skill sets differ.

Cero also gives you a ranged approach to the Arrancar inner challenge. Cover can help separate you from the opponent between casts; the Partial Resurrección guide covers the positioning and unlock sequence.

Adapt the Setup to Your Fight

Nearby groups while playing Hollow

If your form has Ground Smash and Roar, use Ground Smash when enemies gather close, then follow with Roar. Ground Smash covers nearby targets, while Roar's knockback helps create separation. Mix in M1 and Cero as enemies approach, and watch your cooldowns before committing to another close-range exchange.

Against a stronger nearby enemy, block its attack, look for a Cero opening, then use M1 while you can safely stay in range. Return to defense as the enemy starts attacking again.

Arrancar events and opening Raid waves

With Cazador available and active, a practical later loadout combines Cero, High-Speed Regeneration, Triple Strike, and Hurricane Slash, provided those racial abilities are on your bar. Each serves a different purpose:

  • Cero: a ranged attack to mix with melee.
  • High-Speed Regeneration: recovery support when available.
  • Triple Strike: close-range sword attacks with stun, useful for interrupting pressure.
  • Hurricane Slash: an attack around your character, useful when enemies crowd you.

Use the form attacks alongside ordinary sword attacks, keeping recovery available instead of spending every opening on offense. This setup is useful for event combat and the opening Raid waves; later waves still require adapting to the enemies you face.

For choosing a weapon form, compare the Resurrección PvE recommendations. For entry costs and the wave objective, use the Raid guide.

Search the archive

HOLLOW Roblox Races: Soul Reaper or Hollow?
HOLLOW Roblox Beginner Progression and Leveling GuideHOLLOW Evolution Guide: Gillian to Vasto Lorde and ArrancarHow to Get Shikai in HOLLOW: Squad, Spirit and ReleaseHow to Unlock Partial Resurrección in HOLLOW Roblox
HOLLOW Hollow Tutorial: First Meal to The HungerHOLLOW Soul Reaper Tutorial: Riku's Starter QuestsHOLLOW Roblox Quests: Objectives, Rewards and Turn-insHow to Get Shikai in HOLLOW: Squad, Spirit and Release
HOLLOW Soul Reaper Tutorial: Riku's Starter QuestsHow to Get Shikai in HOLLOW: Squad, Spirit and Release
How to Get Shikai in HOLLOW: Squad, Spirit and ReleaseHOLLOW Shikai List, Moves and Reroll Menu
How to Unlock Partial Resurrección in HOLLOW RobloxHOLLOW Roblox Resurrections: Weapons, Moves and RerollsHOLLOW Resurrection PvE Tier List for Event Farming
HOLLOW Roblox Clans: Roll Chances, Perks and Rerolls
HOLLOW Body Types: Bulky, Crawler and Winged
HOLLOW Roblox Skills: Requirements, Prices and EquipmentHOLLOW PvE Starter Builds and Skill Buying PrioritiesHOLLOW Roblox Stats and Stat Point Planner
HOLLOW Roblox Stats and Stat Point PlannerHOLLOW PvE Starter Builds and Skill Buying Priorities
HOLLOW PvE Starter Builds and Skill Buying PrioritiesHOLLOW Roblox Accessories: Reiatsu Gloves and BraceletHOLLOW Roblox Stats and Stat Point Planner
HOLLOW Resurrection PvE Tier List for Event FarmingHOLLOW PvE Starter Builds and Skill Buying Priorities
HOLLOW Roblox Controls, Menus and PC KeybindsHOLLOW Roblox Combat Guide: Basics and M1 Fixes
HOLLOW Roblox Combat Guide: Basics and M1 FixesHOLLOW PvE Starter Builds and Skill Buying Priorities
HOLLOW Meditation Guide: How to Start and Handle WaitingHow to Get Shikai in HOLLOW: Squad, Spirit and ReleaseHow to Unlock Partial Resurrección in HOLLOW Roblox
HOLLOW Roblox Events: Find Disturbances and Clear NodesHOLLOW World Boss Rewards and Arrancar InvasionHOLLOW Roblox Party System and Event Leader Rules
How to Open the Raid Gate in HOLLOW RobloxHOLLOW Roblox Materials: Fragments, Shards and Raid Costs
HOLLOW World Boss Rewards and Arrancar InvasionHow to Get Shikai in HOLLOW: Squad, Spirit and ReleaseHow to Unlock Partial Resurrección in HOLLOW Roblox
HOLLOW Roblox Locations, NPC Markers and World TravelHow to Open the Raid Gate in HOLLOW Roblox
HOLLOW Roblox Party System and Event Leader RulesHOLLOW Roblox Events: Find Disturbances and Clear Nodes
HOLLOW Roblox Accessories: Reiatsu Gloves and Bracelet
HOLLOW Roblox Consumables: Effects, Sources and Hotbar SetupHOLLOW Roblox Combat Guide: Basics and M1 Fixes
HOLLOW Roblox Materials: Fragments, Shards and Raid CostsHow to Open the Raid Gate in HOLLOW Roblox
HOLLOW Roblox Chests: Sources, Rewards and Mass OpeningHOLLOW World Boss Rewards and Arrancar Invasion
HOLLOW Roblox Currencies: Yen and Essence
HOLLOW Roblox Customization: Character Creation and Reiatsu ColorHOLLOW Body Types: Bulky, Crawler and WingedHOLLOW Roblox Clans: Roll Chances, Perks and RerollsHOLLOW Roblox Game Passes: Prices, Features and Faster Charge
HOLLOW Roblox Game Passes: Prices, Features and Faster Charge
HOLLOW Primordial Vasto Lorde Badge Requirements
HOLLOW Roblox Stats and Stat Point PlannerHow to Open the Raid Gate in HOLLOW RobloxHOLLOW Roblox Game Passes: Prices, Features and Faster Charge